


The GoCrypto (GoC) token is a multichain utility token issued on the Bitcoin Cash (SLP) blockchain, Smart Bitcoin Cash (smartBCH), and BNB Smart Chain (BSC). This article offers step-by-step instructions on how to store the GoC token in a hardware wallet.
What is a hardware wallet?
A hardware wallet is a cryptocurrency wallet which stores the user’s private keys in a secure hardware device. These devices provide full isolation between private keys and your computer or smartphone in the event of a hacking attempt or other malicious actions.
Cryptocurrencies are never stored within the hardware wallet itself. Your hardware wallet only stores and protects your private keys, used to authorize outgoing transactions on the blockchain.
Hardware wallets give you an extra layer of protection against cyber attacks, phishing sites, and malware.
How to store the GoC token in a hardware wallet?
Currently, two of the most widely used hardware wallets are Ledger and Trezor. For the purpose of this tutorial, we will be using the Trezor hardware wallet, which supports all three networks on which the GoC token is issued - Bitcoin Cash (SLP), Smart Bitcoin Cash (smartBCH), and BNB Smart Chain (BSC). If you prefer to use the Ledger device, please follow the Ledger instructions.
In the case of the BSC and smartBCH network, we will connect the hardware wallet through the MetaMask wallet. For the SLP network, we will need to use the Electron Cash wallet (SLP Edition).
If you are already using a MetaMask wallet, you can skip this first part and start reading from the Pairing MetaMask with your hardware wallet.
If you do not have a MetaMask wallet set up or have not added GoC tokens to it yet, follow this simple procedure below.
Setting up the MetaMask Wallet
Install the MetaMask extension (Visit MetaMask FAQs for all the information) and set up the smartBCH or BSC network.
Don’t forget to add some BNB to your Metamask wallet to cover the transaction fees (approx. $0.20 per transaction).
BNB Smart Chain
Add BNB Smart Chain into MetaMask (Visit Binance Academy for further information).
Network Name: Smart Chain
New RPC URL: https://bsc-dataseed.binance.org/
ChainID: 56
Symbol: BNB
Block Explorer URL: https://bscscan.com
SmartBCH
Add SmartBCH into MetaMask –> Click the Network icon in the upper right corner and choose “Add Network”.
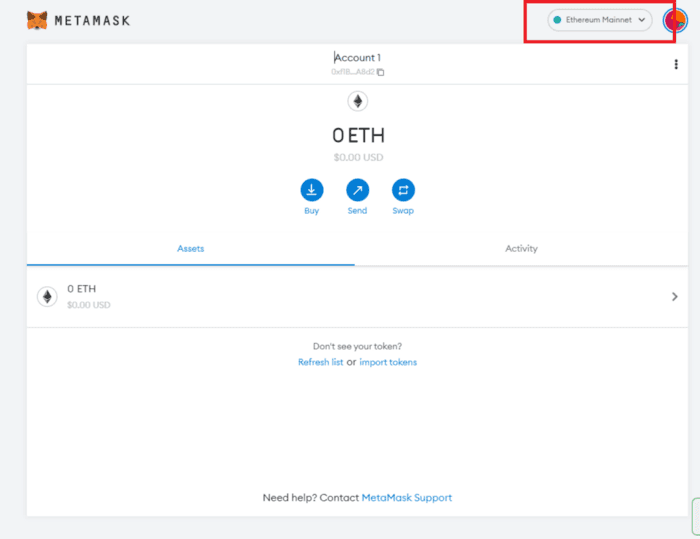
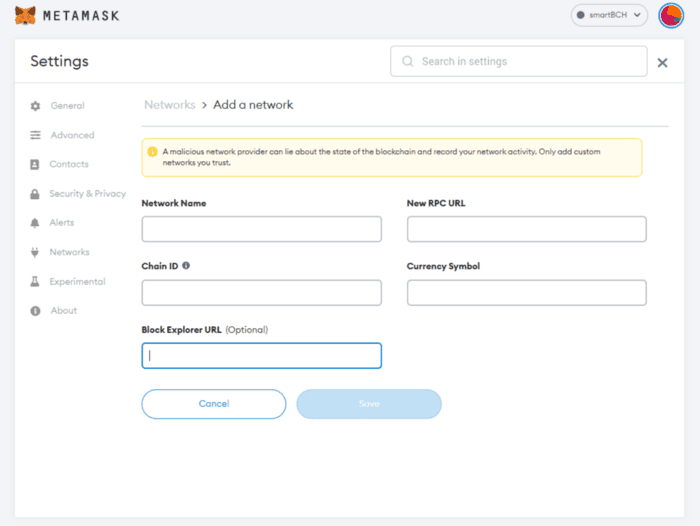
A new settings window will display. Fill the text fields with the following data and click “Save”.
Network name: smartBCH
New RPC URL: https://smartbch.greyh.at
ChainID: 0x2710
Symbol (optional): BCH
Block Explorer URL (optional): https://www.smartscan.cash/
Adding GoC token to MetaMask wallet
Follow these steps to add the GoC Token contract address to MetaMask:
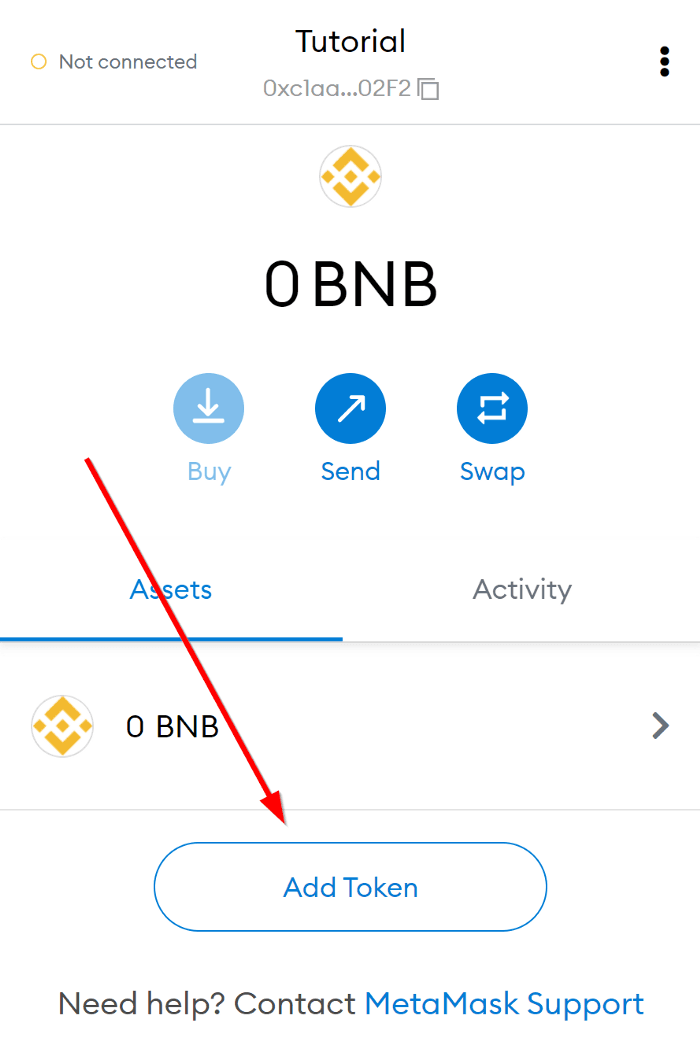
Open MetaMask and choose “Add Token”.
2. Insert GoC Token information.
GoC smartBCH contract address: 0x4b85a666dec7c959e88b97814e46113601b07e57
GoC BSC contract address: 0x4b85a666dec7c959e88b97814e46113601b07e57
Make sure you choose the right contract address, depending on the chain you wish to use (BSC or smart BCH).
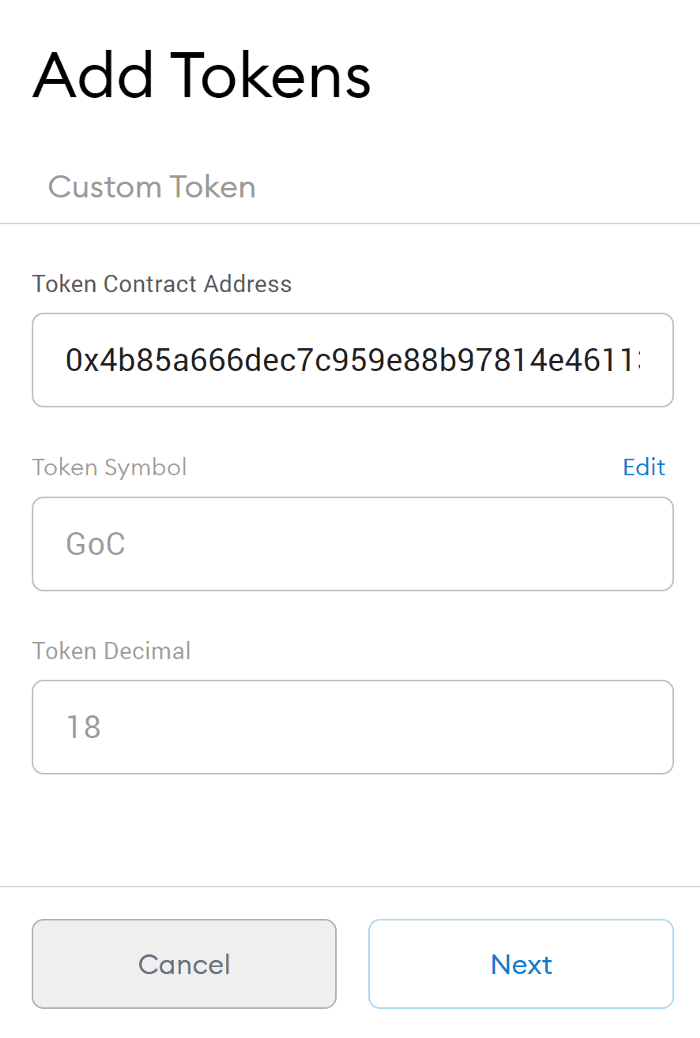
Click “Next” -> “Add Tokens” and the GoC will successfully be added to MetaMask.

Pairing MetaMask wallet with your hardware wallet
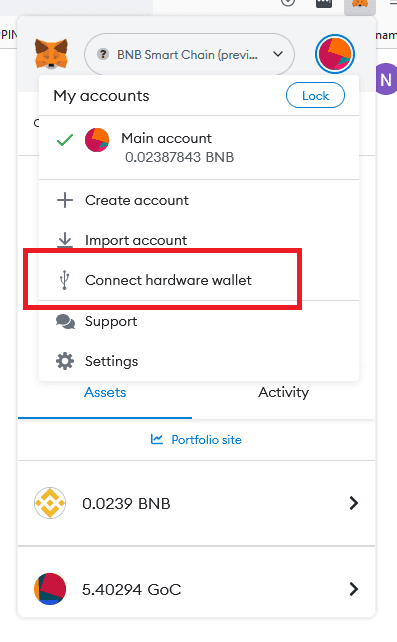
Click on the account icon in the top right corner and select Connect Hardware Wallet.
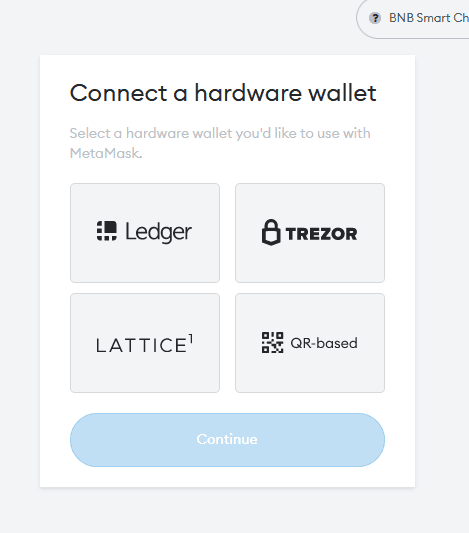
Set up your hardware device, including your hardware wallet desktop app. Make sure your hardware device is plugged in and click Connect.
A hardware wallet Connect prompt will pop up asking for permissions and a request to export the public key. Allow and export to continue.
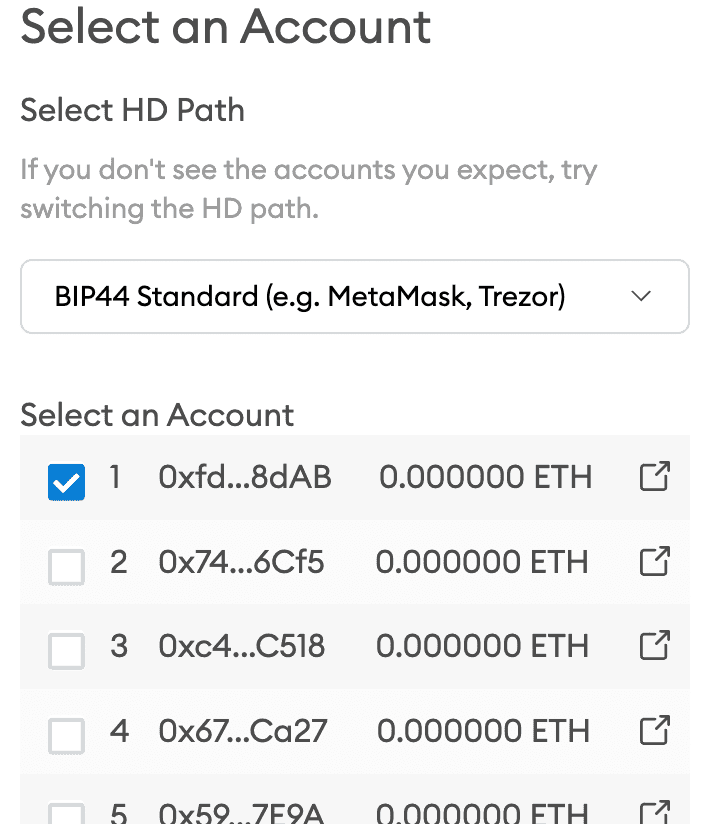
Select the account you want to use (you can choose the one on the top of the list) and click on Unlock.
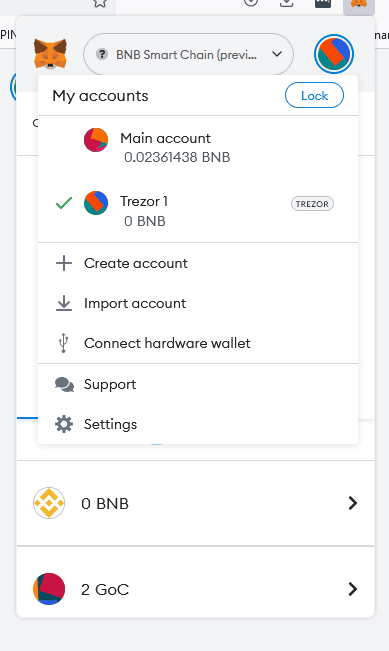
5. You have successfully imported an account (its public keys) to MetaMask. Repeat for other accounts if you have more than one. If you want to see the whole address of this account navigate to account details in the top right. First one is the MetaMask default account, the second one is the hardware wallet account with the passphrase.
Sending GoC token to hardware wallet account
In your MetaMask, select your account.
Navigate to the Send option and choose Transfer between my accounts.
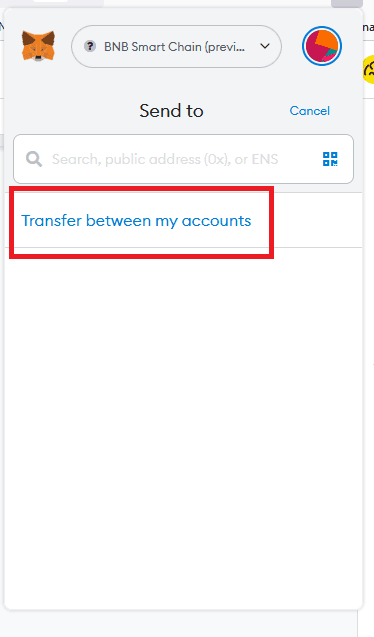
Select the hardware wallet account, fill out the necessary transaction info and confirm the transaction. Once the transaction is complete, your token should appear in your hardware wallet account.
If you wish to send tokens back to your initial MetaMask address, do not forget to add relative tokens for transaction fees.
Setting up the Electron Cash Wallet
Go to ElectronCash.org and download Electron Cash (SLP Edition) for your operating system.
Open the Electron Cash App and create a name for your wallet. Click Next.
Choose the Standard Wallet (SLP-enabled) option and click Next.
Select to create a new seed or use an existing seed to restore a wallet. It is highly recommended that you do not store your seed in a digital form, but rather write it down on paper and store it in a safe location. Click Next.
You will be asked to confirm that you have saved your seed by retyping it.
Create a password for your wallet and click Next.
Please note that you will need to deposit some BCH to your wallet in order to cover the fees for any future transactions.
Pairing Electron Cash wallet to your hardware wallet
Connect and unlock your hardware wallet device.
Open the Bitcoin Cash app.
Launch Electron Cash from your applications folder. The install wizard opens.
Leave the default wallet name and click Next.
Select Standard wallet and click Next.
At the keystore screen, select Use a hardware device and click Next.
Select your hardware wallet device and click next.
Leave the derivation path as default (m/44'/145'/0') and click Next.
Your addresses are now generated and your account balances should be shown in the History tab. You can now manage your GoC on SLP from your hardware wallet.
Sending GoC from Elly Wallet to hardware wallet account
Open your Elly Wallet and select Withdraw.
Add the MetaMask wallet address, fill out all necessary transaction information and confirm the transaction.
Once the transaction is complete, the GoC token should appear in your MetaMask wallet which is paired with the hardware wallet.
About GoC token
The total supply of the GoC token is 299,095,759 GoC and will never exceed this amount, no matter how many blockchains the GoC token supports. We are not minting and burning tokens in real time; instead, we have duplicated supplies on every supported chain that is illiquid and held on reserve addresses. A certain amount of tokens can only become liquid when the same GoC amount from another chain gets locked on one of the reserve addresses through the GoC Bridge App.
If you are holding the GoC token on Elly Wallet, please note that the GoC token will be automatically migrated from SLP to BNB Smart Chain (BSC) on December 6th, 2022. Elly Wallet users don’t need to take any actions. However, the GoC Bridge will still support SLP migrations, which means users will be able to continue migrating the GoC token from and to SLP.
Step-by-step tutorial on how to migrate the GoC token through the GoC Bridge app is available in our blog How to use GoC bridge.
Join the GoCrypto community on Telegram!


