


The GoC Bridge service enables fast and secure bi-directional swaps of the GoCrypto (GoC) token between multiple blockchains.
This article will take you through the bridging process step-by-step.
If you are already using a MetaMask Wallet, you can skip this first part and start reading from the How to swap GoCrypto token (GoC) from Simple Ledger Protocol to smartBCH or Binance Smart Chain section.
If you do not have a MetaMask Wallet set up or have not added GoC tokens to it yet, follow this simple procedure below.
Setting up the MetaMask Wallet
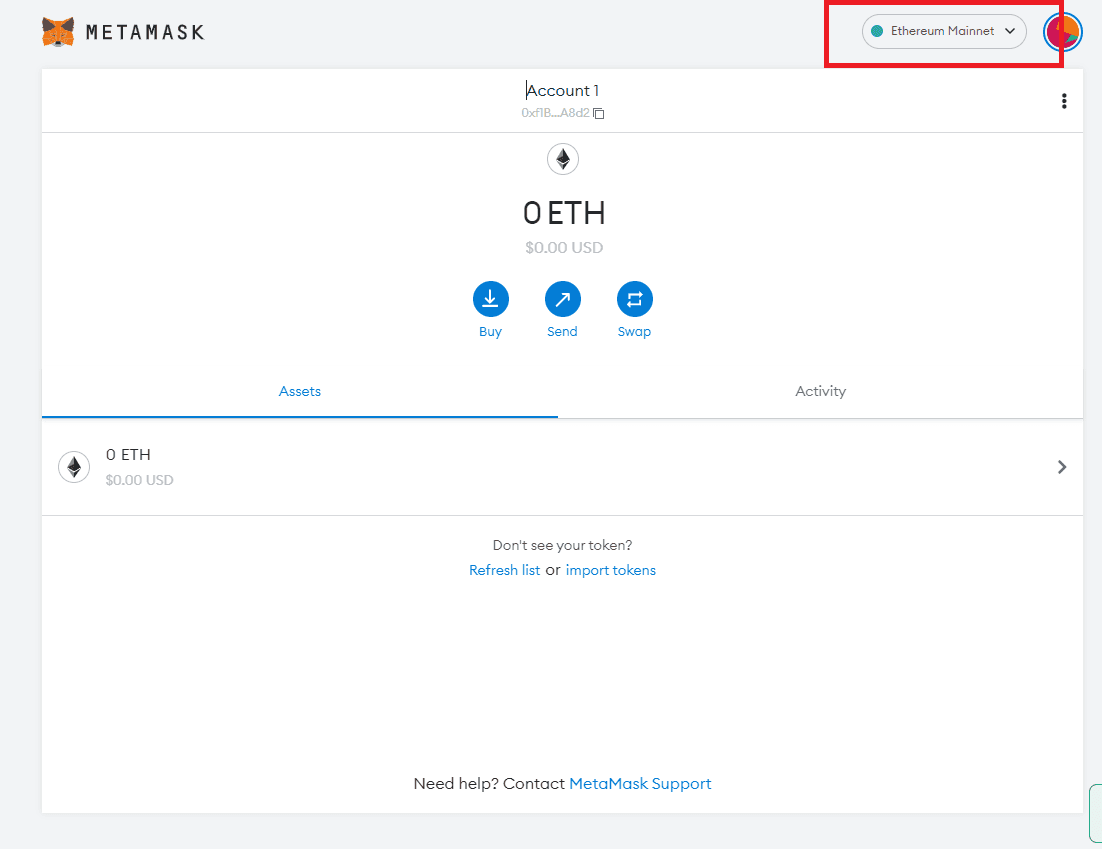
Install the MetaMask extension (Visit MetaMask FAQs for all the information) and set up the smartBCH or BSC network.
Don't forget to add some BNB to your Metamask wallet to cover the transaction fees (approx. $0.20 per transaction).
SmartBCH
Add SmartBCH into MetaMask –> Click the Network icon in the upper right corner and choose “Add Network”.
A new settings window will display. Fill the text fields with the following data and click “Save”.
Network name: smartBCH
New RPC URL: https://smartbch.greyh.at
ChainID: 0x2710
Symbol (optional): BCH
Block Explorer URL (optional): https://www.smartscan.cash/

Binance Smart Chain
Add Binance Smart Chain into MetaMask (Visit Binance Academy for further information).
Network Name: Smart Chain
New RPC URL: https://bsc-dataseed.binance.org/
ChainID: 56
Symbol: BNB
Block Explorer URL: https://bscscan.com
Adding GoC token to MetaMask Wallet
Follow these steps to add the GoC Token contract address to MetaMask:
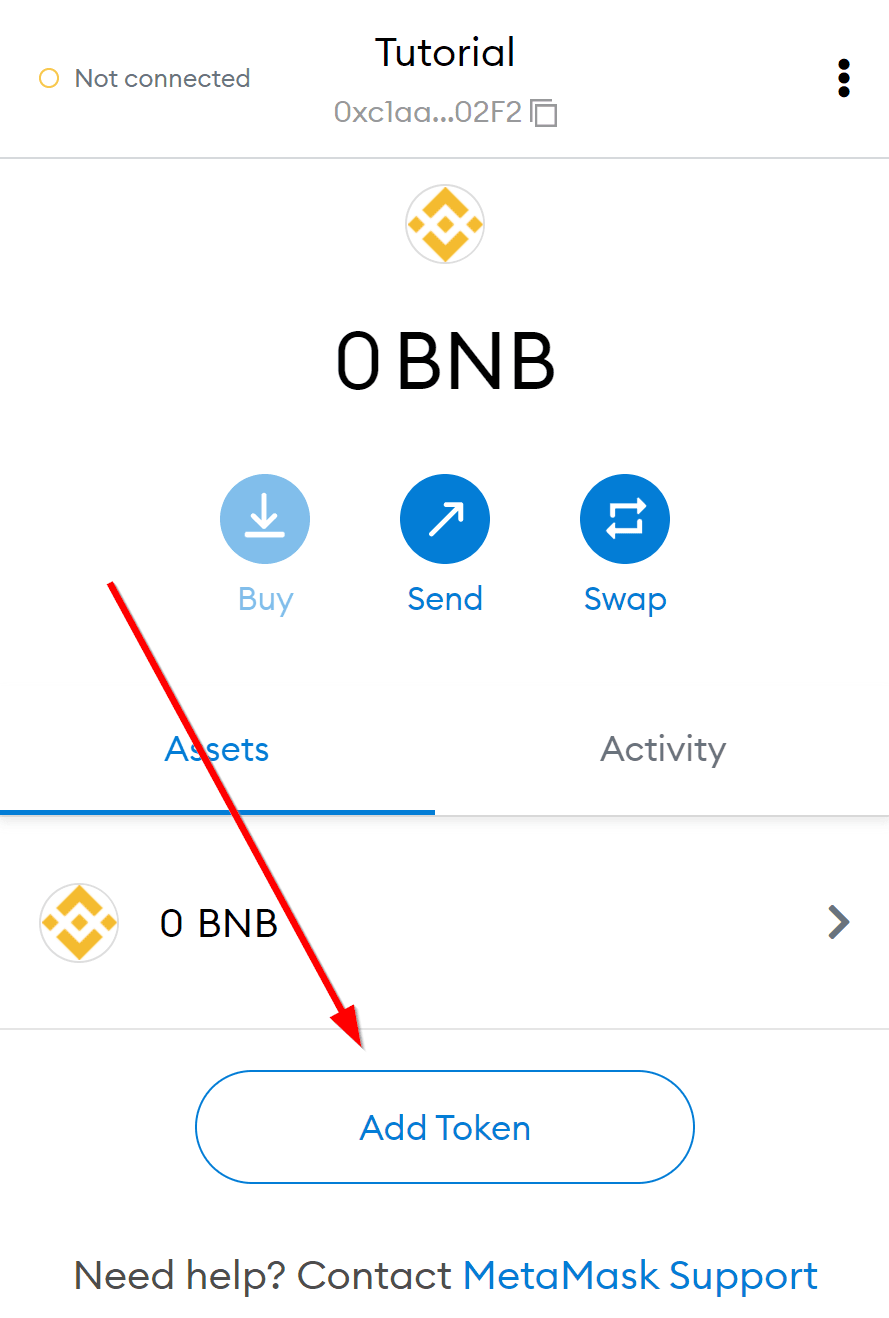
Open MetaMask and choose “Add Token”.
2. Insert GoC Token information.
GoC smartBCH contract address: 0x4b85a666dec7c959e88b97814e46113601b07e57
GoC BSC contract address: 0x4b85a666dec7c959e88b97814e46113601b07e57
Make sure you choose the right contract address, depending on the chain you wish to use (BSC or smart BCH).
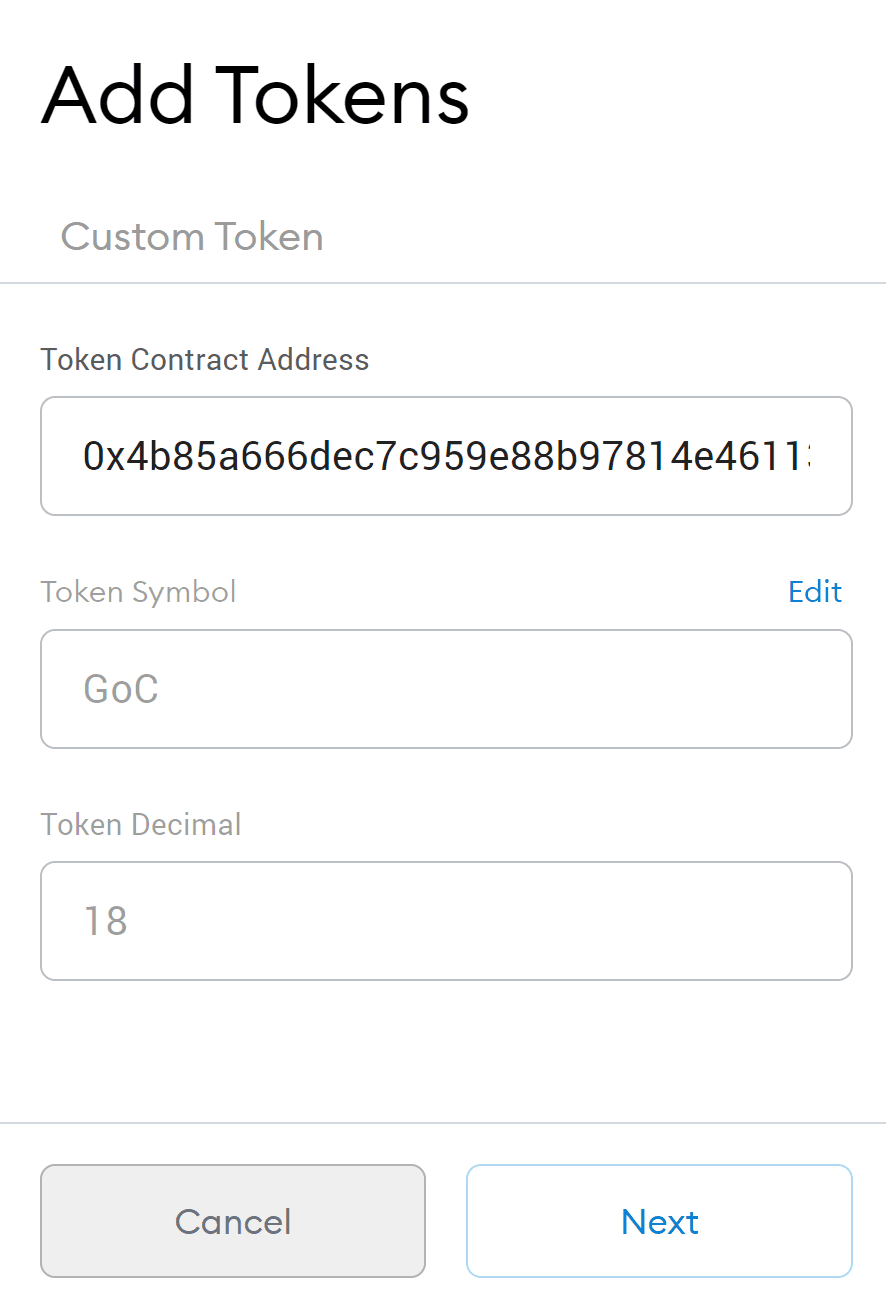
Click “Next” -> “Add Tokens” and the GoC will successfully be added to MetaMask.

How to swap GoCrypto token (GoC) from Simple Ledger Protocol to smartBCH or Binance Smart Chain
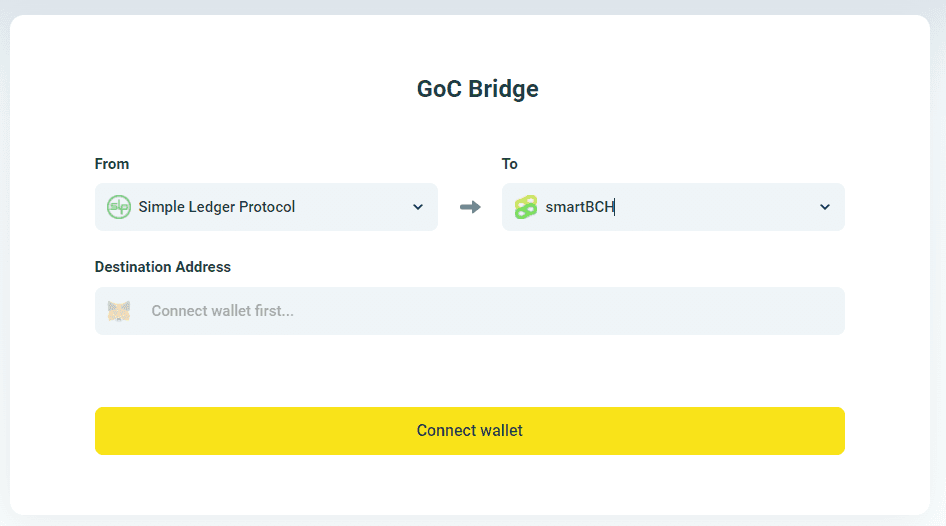
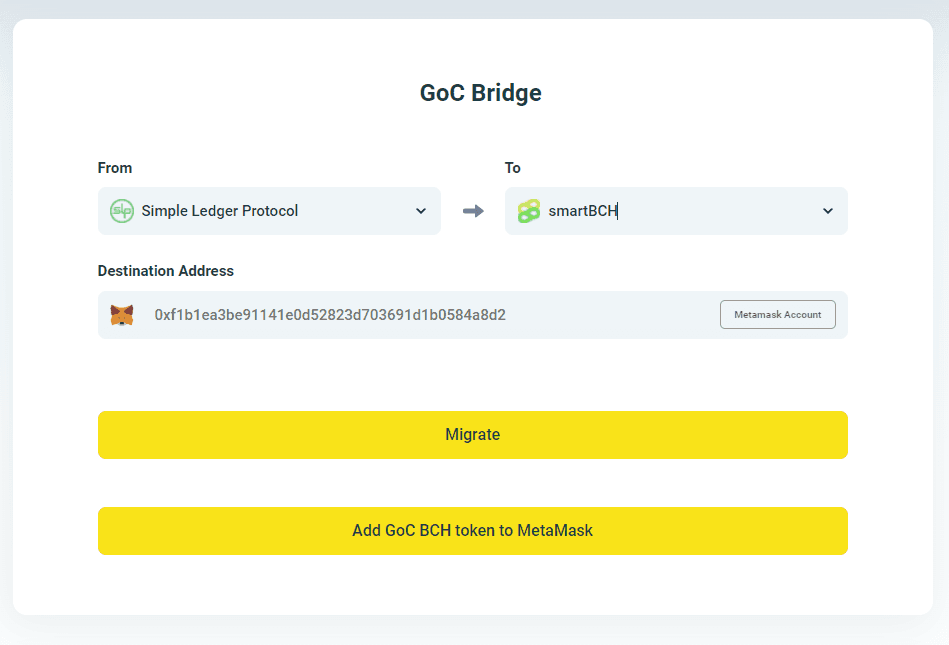
1. In the “From” window select Simple Ledger Protocol. In the “To” window select smartBCH or Binance Smart Chain (whichever you want to bridge to).
2. Connect your MetaMask with the GoC Bridge by pressing the “Connect Wallet” button (Destination Address will automatically be inserted upon connecting MetaMask with Bridge).
3. Press “Migrate”.
4. A Pop-up window will appear with the deposit address. Deposit the GoC on the SLP address shown in the pop-up window. The GoC deposited to the address in the pop-up window will be automatically transferred to your Destination Address.
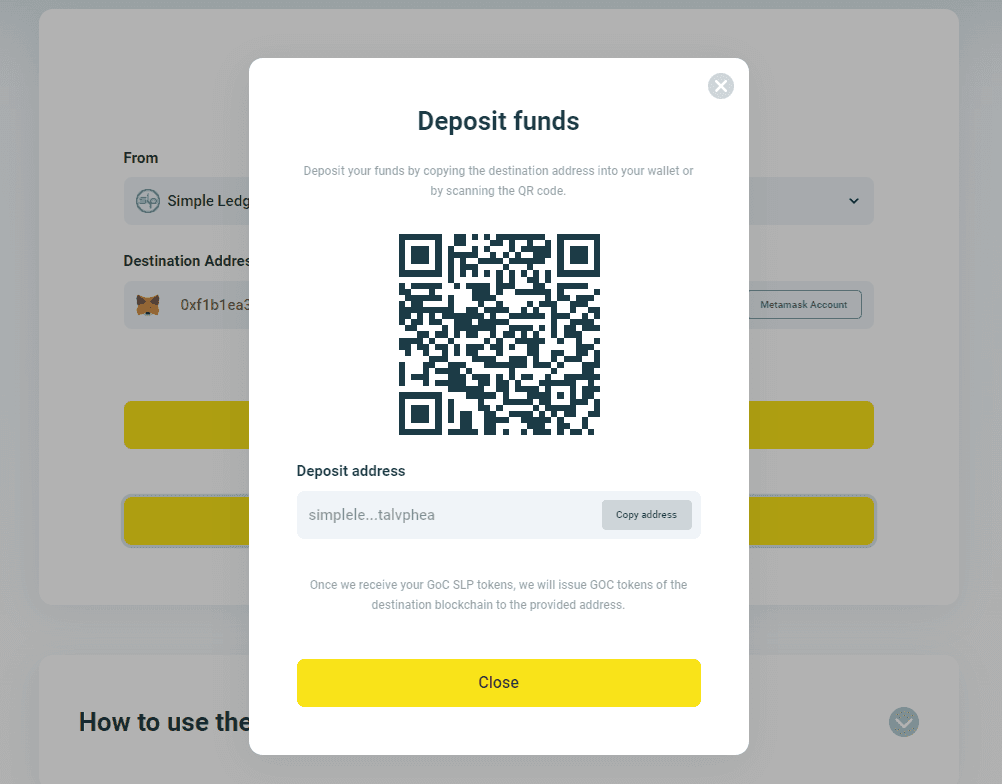
*Note: This is an illustration. Please do not deposit to the address displayed in the picture above! Each user gets a different deposit address.
How to swap GoCrypto token (GoC) from smartBCH or Binance Smart Chain to Simple Ledger Protocol
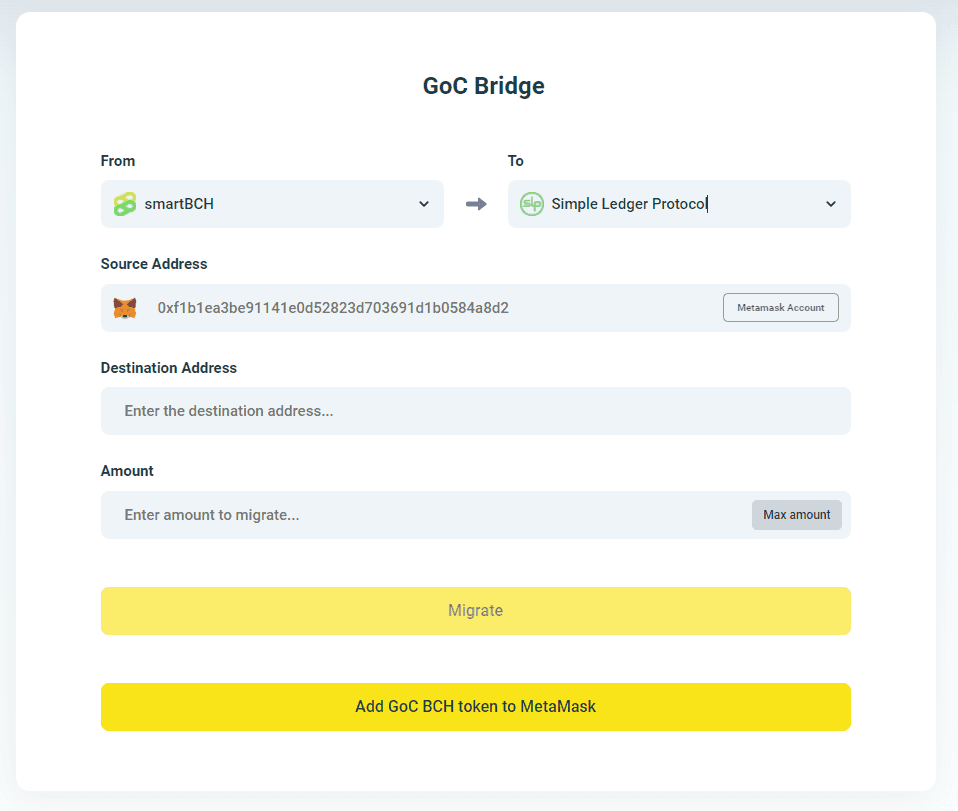
1. In the “From” window, select smartBCH or Binance Smart Chain. In the “To” window, select Simple Ledger Protocol.
2. Connect your MetaMask with the GoC Bridge by pressing the “Connect Wallet” button (“Source Address” will automatically be inserted upon connecting MetaMask with Bridge).
3. Insert your destination SLP address and the amount you wish to migrate.
4. When all the information is correctly inserted, press “Migrate”.
5. A new pop-up window will open with the offer of approval. Check all the data input and press “Approve”.
6. A second pop-up will open with the offer of Confirmation. Press “Confirm” and the migration process will begin.
How to swap GoCrypto token (GoC) from smartBCH to Binance Smart Chain or vice versa
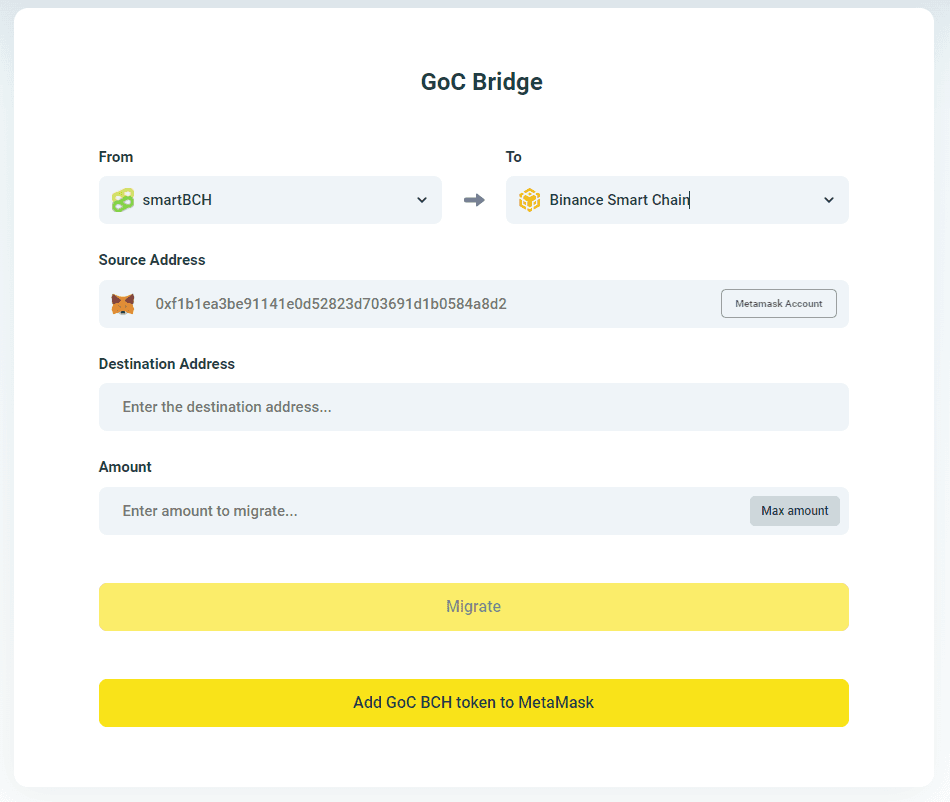
1. In the “From” window, select smartBCH. In the “To” window, select Binance Smart Chain.
2. Connect your MetaMask with the GoC Bridge by pressing the “Connect Wallet” button (“Source Address” will automatically be inserted upon connecting MetaMask with Bridge).
3. Insert your destination Binance Smart Chain address and the amount you wish to migrate.
4. When all the information is correctly inserted, press “Migrate”.
5. A new pop-up window will open with the offer of approval. Check all the data input and press “Approve”.
6. A second pop-up will open with the offer of Confirmation. Press “Confirm” and the migration process will begin.
Join the GoCrypto community on Telegram!


